As you might remember from this post a couple of weeks ago, I participated in a Secret Santa Swap organised by the awesome Kara from Me & Elna. Handmade swaps are great for three reasons - having a reason to get creative for someone you don't know, receiving a parcel with special gifts made just for you, and making new friends. I have got to know some amazing people by being partners with them in a handmade swap.
Amy from Form*work was my Secret Santa, and I was so thrilled with the gifts she made me. Her fabric choices and the items she made were exactly my style.
Here are her creations:
This stunning linen tea towel with appliqued Christmas tree. I have it displayed in the kitchen at the moment and every time anyone goes to wipe their hands on it I lose my mind. I don't think there is such a thing as a 'tea towel for decoration only' but too bad - I've claimed that title for this one!
Two cards designed by Amy. I couldn't bring myself to send them to anyone this Christmas. I like them too much - they need to stay with me for a while longer so I can admire them! Maybe next year someone lucky might receive one of them. Maybe.
How gorgeous is this little house ornament? It hangs on the bookshelf part of my sewing desk. Amy used the Retro Mama Fabric House Ornament pattern. I adore the little bird, and the number on the door. Little details that make it such a sweet ornament - I will definitely give this pattern a go. Great way to use scraps too. Amy - you will have to tell me how on earth you got those stitches around the number 3 so neat!
Thank you so much Amy - when a parcel arrived postmarked from Illinois, USA it was so exciting, then to open and find these lovelies inside made my day!
Make sure you check out Amy's work at her blog and her Etsy shop (you can buy those beautiful cards and other handmade goodies there). You can also find her here on Pinterest.
Showing posts with label card making. Show all posts
Friday, December 21, 2012
Thursday, January 12, 2012
Christmas Card Swap
It feels like Christmas was a very long time ago, but thanks to the tardiness of Australia Post and the USPS, I still have one more Christmas post for you!
I participated in a handmade card swap hosted by Fingerprints on the Fridge, and was partnered with the lovely Hailey from Coastal Heart, Country Soul. It is so great when you connect with people in other parts of the world and discover that you have a lot in common. During our email chats I found out that Hailey's brother lived in Australia for a while to play ice hockey, and she and her hubby had holidayed in New Zealand earlier in the year (we were there over Christmas). Such a small world. I really recommend you visit Hailey at her lovely blog which is full of creativity and variety.
Here is the stunning card Hailey made for me -
Love those paper rosettes! I only received this in the mail last week so it was a lovely surprise. Another coincidence for Hailey and I - we both used sheet music in our cards.
Here is the card I sent to Hailey -
I picked up a huge stash of old sheet music from the op-shop in Barwon Heads (best op-shop ever!) for the bargain price of 50c. I cut some into ornament shapes, and of course I had to use my sewing machine! I stitched the ornament shapes to the card and embellished them with different buttons, some glued on and some stitched on. Finally some stamps and little rhinestones for a bit of extra bling!
The sheet music had a couple of sheets of songs that fit perfectly into the card so I cut one out and stuck it inside, stamping it for an added festive touch. It was great for covering up the stitching on the inside of the card.
When I got home, I went through the folder of sheet music and this fell out -
How gorgeous! I plan to put it in a simple white frame and hang it in my little Lucy's room!
I participated in a handmade card swap hosted by Fingerprints on the Fridge, and was partnered with the lovely Hailey from Coastal Heart, Country Soul. It is so great when you connect with people in other parts of the world and discover that you have a lot in common. During our email chats I found out that Hailey's brother lived in Australia for a while to play ice hockey, and she and her hubby had holidayed in New Zealand earlier in the year (we were there over Christmas). Such a small world. I really recommend you visit Hailey at her lovely blog which is full of creativity and variety.
Here is the stunning card Hailey made for me -
Love those paper rosettes! I only received this in the mail last week so it was a lovely surprise. Another coincidence for Hailey and I - we both used sheet music in our cards.
Here is the card I sent to Hailey -
I picked up a huge stash of old sheet music from the op-shop in Barwon Heads (best op-shop ever!) for the bargain price of 50c. I cut some into ornament shapes, and of course I had to use my sewing machine! I stitched the ornament shapes to the card and embellished them with different buttons, some glued on and some stitched on. Finally some stamps and little rhinestones for a bit of extra bling!
The sheet music had a couple of sheets of songs that fit perfectly into the card so I cut one out and stuck it inside, stamping it for an added festive touch. It was great for covering up the stitching on the inside of the card.
When I got home, I went through the folder of sheet music and this fell out -
How gorgeous! I plan to put it in a simple white frame and hang it in my little Lucy's room!
Wednesday, November 23, 2011
Thrifty Gift Tags - Tutorial
Let's face it - it all ends up in the rubbish bin on Christmas Day once the gifts have been torn open, right? So I am not spending extra money on wraps and cards. I love a really prettily wrapped gift though, so I made these gift cards which I think look lovely and cost me next to nothing!
Here is how I did it:
You need -
scrap cardboard, not too thick (mine came from the insert in a wine box)
scissors or paper trimmer
hole punch
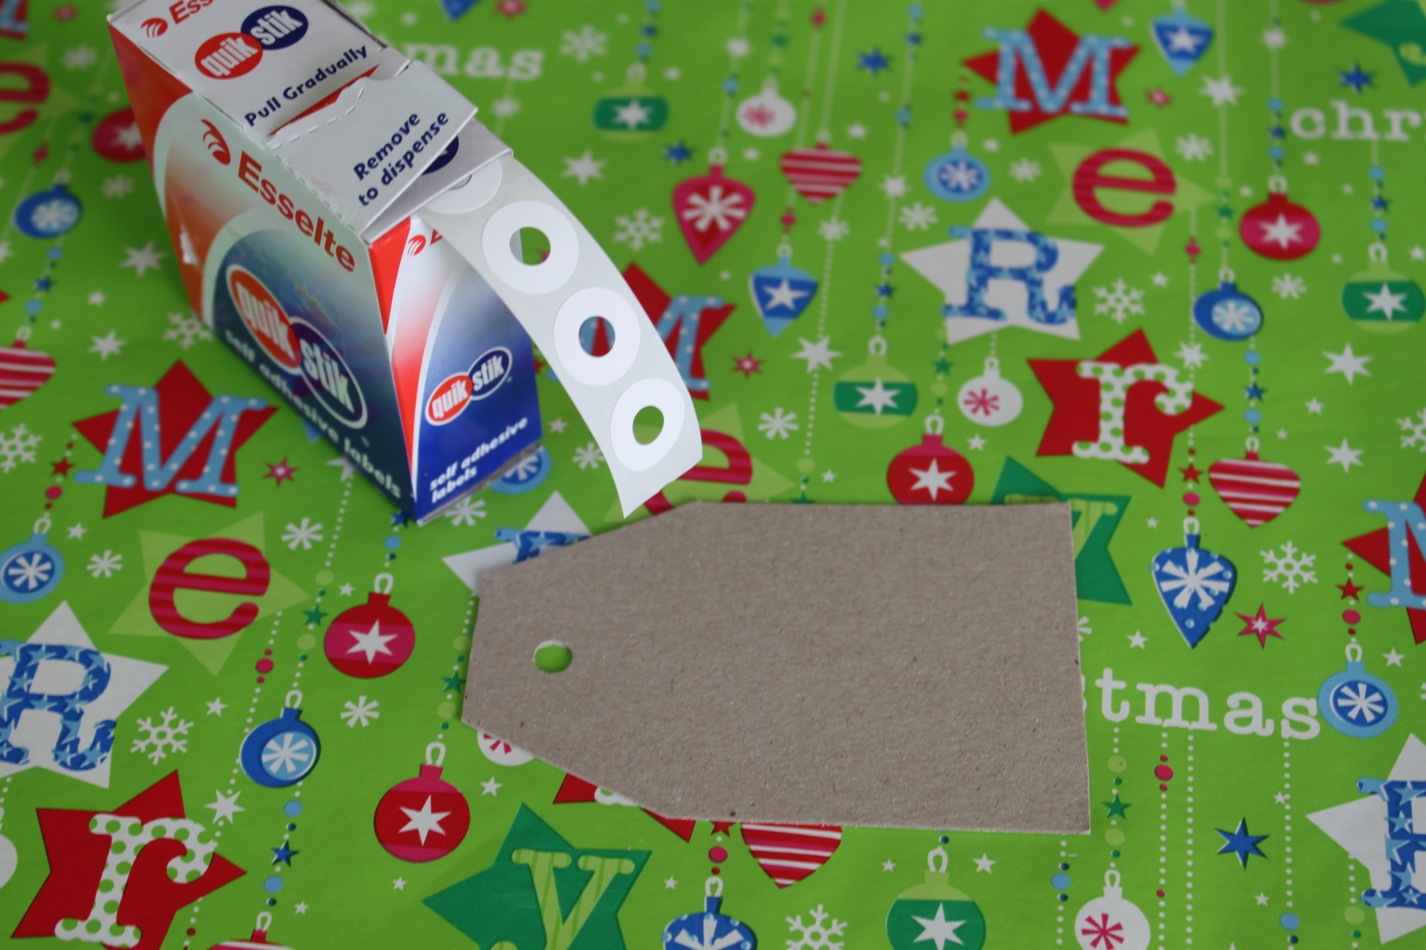
ring binder reinforcement stickers
stamp kit and ink pad and/or dollar store Christmas themed stickers
First, take your cardboard and your scissors and cut your cards. I use a pre made one as a template and cut around it, you may choose to make a template in the desired shape and size you want, then cut as many as you can from your cardboard.
You can also buy gift tag shaped craft punches which make the job very quick and easy.
Next, take your hole punch and punch a hole into the end of the tag.
This is optional, but I think it gives a more authentic luggage tag look - stick your ring binder sticker around the hole you just punched. I bought them at an office supplies store.
Time to decorate! Use your stamps if you have some. My ink pad and letter stamps came from the craft store. The cute reindeer stamp I bought here. I used some christmas words this time, but I often personalise them with the gift recipient's name.
Brown paper packages tied up with string...these are a few of my favourite things!
Make sure you follow me in your preferred way - GFC, Facebook, email, RSS - I have a little give away coming up for my readers later this week and I think you'll love it! Don't miss it!
Lots more creative ideas here!
I would love it if you shared a picture of your finished product at my Flickr Group!
Here is how I did it:
You need -
scrap cardboard, not too thick (mine came from the insert in a wine box)
scissors or paper trimmer
hole punch
ring binder reinforcement stickers
stamp kit and ink pad and/or dollar store Christmas themed stickers
First, take your cardboard and your scissors and cut your cards. I use a pre made one as a template and cut around it, you may choose to make a template in the desired shape and size you want, then cut as many as you can from your cardboard.
You can also buy gift tag shaped craft punches which make the job very quick and easy.
Next, take your hole punch and punch a hole into the end of the tag.
Time to decorate! Use your stamps if you have some. My ink pad and letter stamps came from the craft store. The cute reindeer stamp I bought here. I used some christmas words this time, but I often personalise them with the gift recipient's name.
Or you can use some dollar store stickers to make some pretty tags like these:
Now add them to your lovely gifts:
Make sure you follow me in your preferred way - GFC, Facebook, email, RSS - I have a little give away coming up for my readers later this week and I think you'll love it! Don't miss it!
Lots more creative ideas here!
I would love it if you shared a picture of your finished product at my Flickr Group!
Subscribe to:
Posts (Atom)