Showing posts with label tutorials. Show all posts

Tuesday, January 13, 2015

Upcycling Inspiration for Kid's Clothes Week

The next Kid's Clothes Week is happening in a few weeks (February 2-8)  and I haven't sewn along for a very long time, but I really love the theme of the next round - UPCYCLED.

Here is a quick round up of a few fun upcycling projects I have done and some tutorials that will work perfectly with this theme and get you ready for KCW.

Upcycled Baby Blankets to T-shirts - I put together this quick tutorial last year sharing how to maximise the fabric in your old jersey baby blankets to make tees for your kids. I bet you have lots of these blankets at home, but if not you can often pick them up cheaply at the thrift store.


Look how little my baby girl is in this picture! She has grown up so much! *sobs*

Monday, October 6, 2014

30 Minute Basic Skirt Tutorial


This tutorial was originally shared over at Jenny's blog Mend and Make New as part of her Handmade Kids Clothes swap festivities.

This is a very quick little tutorial that will have you churning out bunches of skirts for all the little girls you know! I say 30 minutes but that depends on your experience and tools - if you have an overlocker you could probably make it even quicker. When I first started sewing it would have taken me a bit longer.

I'm not re-inventing the wheel here - skirt tutorials are a dime a dozen out there in sewing blog land. This is just my tried and true method for a quick project with winning results - these skirts are plentiful in our house.

In the cooler months Anna loves to layer skirts over leggings and wear boots. Once summer comes around again, she wears her skirts with a tee and some pretty sandals. For us, skirts are an all year around garment.

You don't need much for this project - in fact you probably have everything sitting in your stash right now!


You need:

- Up to 1/2 metre / yard of fabric - I used the whole width from a 45" bolt.
- Elastic for waistband - I like 1" wide for kids garments.
- Large safety pin
- Coordinating thread
- Sewing machine and overlocker (if you have one)
- An existing skirt to measure the length (particularly handy if your child is at school when you sew the skirt!)

1. Take your existing skirt (or your child if they are close by!) and measure the length from waist to above the knee. Add 3" to account for waistband and hemming, then cut your fabric so you have one long piece 45" wide and the length you desire + 3".

2. If you have an overlocker, serge the raw edges along the top and bottom. If you don't have a serger you can skip this part - this is just a little cheat to make hemming and creating a elastic casing at the waist really quick and easy, keeping up the 30 minute time frame :)

3. Cut fabric in half so you have two pieces to form the front and back skirt panels.


4. With fabric right sides together, use your overlocker and stitch the side seams.

If you don't have an overlocker, french seams are a great finish on a skirt like this - quick, easy and very neat - check out this tutorial here for how to sew a french seam. You can also keep it super simple with a straight stitch then trim the seam allowance with pinking shears, or use a zig zag stitch to finish them.

5. Flip your skirt inside out so the wrong side is facing you. Fold the top over 1.5" to create the waistband casing for the elastic. Press.


6. Stitch into place, leaving a 2" gap for inserting the elastic. Because I am super lazy, I just stitch right over the top of the overlock stitches. It keeps my stitching in a nice straight line.

If you are not using an overlocker, fold the raw edge over 1/4" and press. Fold over again 1.5" and press. Stitch in place.

7. The amount of elastic you need will depend on the size of your child. Usually their waist measurement, then deducting 2-3" works for me, so the elastic has some stretch and the skirt stays up.  (so if the waist measurement is 19", cut 17" of elastic.) Alternatively, check out any patterns you have for elasticated garments - they will have a size chart.

Use the large safety pin to attach to the end of your elastic. Push it through the casing. Pin the tail of the elastic outside the gap in the waistband so you don't lose it.


8. Overlap the ends of the elastic and use a zig zag stitch to secure it.


9. Flip the elastic into the waistband then top stitch the gap closed.

10. Fold up the bottom edge and press at the desired length, then stitch the hem in place.

If your edges are not overlocked, fold up 1/4" and press, then fold up 1" to conceal the raw edge then press again. Stitch.


DONE! Woohoo, told you that was quick!

Now place skirt on child (or stick up on a wall with washi tape) and admire.


Fabric details: Pink birds cotton dobby purchased from here.

This type of skirt would suit a variety of fabrics - quilting cotton, corduroy, double gauze, poplin, polycotton. Anything light to medium weight. Knits would work too although the drape would be a bit different.

Make sure you stay updated with my latest tutorials and sewing inspiration - sign up for my newsletter here!

Happy skirt sewing!


Tuesday, July 8, 2014

Red Diamond Quilt - Tutorial

You know those days you wake up and BAM! There is an idea in your head that you can't get rid of and you must MAKE IT NOW!

That happened to me with this quilt. It's the first quilt I have made for myself and it's been lovely this winter to snuggle into it while I watch TV or read in the evenings.


This is a lap quilt made with large half square triangles.  The final size is a 56 inch (142cm) square.

Thursday, June 26, 2014

DIY Floral Crown Tutorial

Sponsored by Fresh Flowers

Oh how I love roses. Especially when they arrive at my door unexpectedly. There is nothing quite like the surprise of a flower delivery! 

And while roses are stunning to display on their own in an arrangement, I also enjoy incorporating flowers into creative projects, like this one!


The lovely people from Fresh Flowers are the professionals when it comes to roses as well as all your other favourite flowers. They supply a huge range of celebration bouquets and arrangements from their website and at the click of a button, you can send something beautiful to a family member or friend to let them know you are thinking of them.

Friday, May 16, 2014

Geometric Zipper Pouch - Tutorial


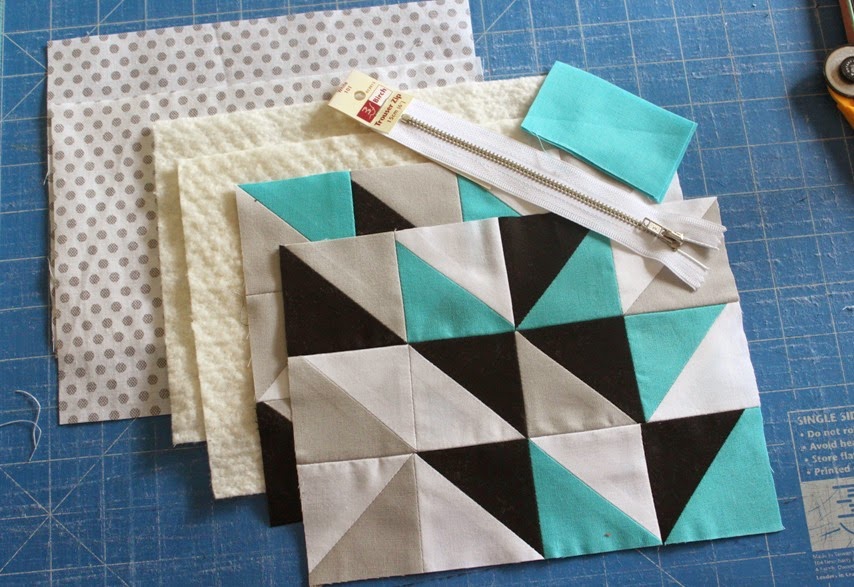
I've seen a number of gorgeous quilts with a similar design using half square triangles around, particularly on pinterest. I wanted to give it a try but on a smaller scale, so I made this little zip pouch. I love the geometric look and the use of solids, which I don't use very often but I think I should!

First you need to make the exterior panels. To do this we need to make some half square triangles.

You need 24 x 3" fabric squares - six squares of each colour.


I chose grey, black, white and teal. You could use any colours, but I like the three monochromatic colours with the teal for a pop of brightness.

To start, pair your squares randomly. Take a pair and mark a line on the diagonal, corner to corner. Repeat for all remaining pairs.


Stitch either side of the line with a 1/4" seam allowance. Repeat for all fabric pairs. Chain stitching makes this a very quick process.


Use you rotary cutter to cut down the middle line. Repeat for all fabric pairs.


Press them all open, they will look like the picture below. Trim off the little tails so you have squares.


Use your half square triangles to assemble two panels with three rows of four HSTs. Once you are satisfied with your layout, start stitching together your rows using a 1/4" seam allowance.


Press your seams on each row.


Stitch your rows together using a 1/4"" seam allowance. Press when you are finished, trim if required.


 Once your panels are finished and pressed you can put together your pouch.

Use your HST panels to cut two pieces of lining and two pieces of cotton batting the same size. You also need a zipper (I used a 6" metal zipper) and some small scraps of fabric for zipper tabs.


 If you don't have batting you can use interfacing, fleece, flannel or something else that will give the pouch some sturdiness.

First take your zipper and tabs. Fold and press the ends of the fabric and stitch carefully onto either end of the zip.


Place your exterior on top of a piece of batting and treat them as one piece. Lay your zipper face down along the top.


Place your lining face down so that right sides are together. Stitch along the top the secure the zipper, lining and exterior.


Open out and repeat for the other side.

Open out and press gently. Top stitch down each side of the zipper to secure the pieces together and avoid the lining getting caught in the zip.


Open the zipper. This is important - you need it open so you can turn it out!

Open out so the exterior panels are right side together and the lining pieces are right side together. Stitch as shown in the picture.


Turn right side out and stitch the gap in the lining shut. Push the lining into the pouch.

You are finished! Admire your lovely zipper pouch!


If you make one I'd love to see it! Share it with me on facebook, instagram or add them to my flickr group. Can't wait to see what colour combinations you choose!

You can check out all my other sewing tutorials here!

If you make any I'd love to see them! Share them with me on Instagram, on my Facebook page or add them to my flickr group. I can't wait to see your fabric combinations!
- See more at: http://www.sewdelicious.com.au/2014/04/scrappy-pot-holders-tutorial.html#.dpuf

Friday, April 25, 2014

Scrappy Pot Holders - Tutorial


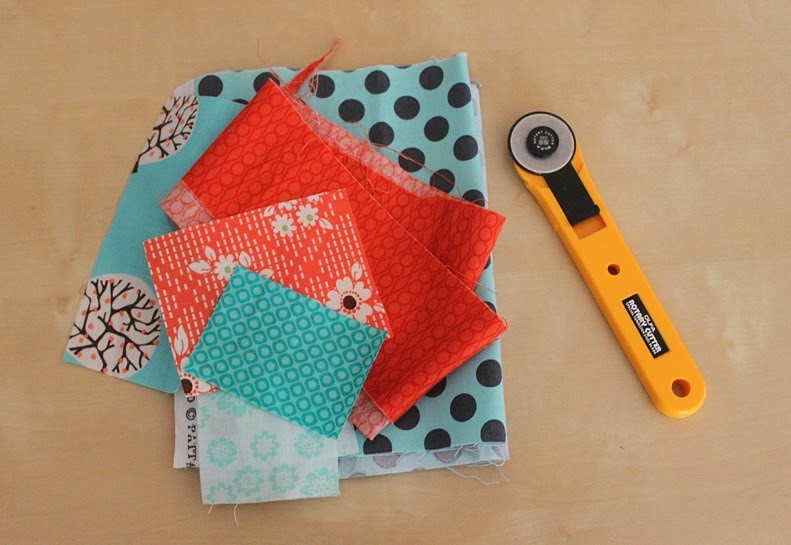
Have you got lots of scrap fabric lying around? Me too. And lately my oven mitts seem to have disappeared. Although I vaguely recollect one of the girls walking around the house with them on her feet pretending to be a duck, so maybe I need to take a closer look in the dress ups box?

Oh well - after making these pot holders for my Nan for Christmas, I decided to make up a couple more for myself, and take photos of all my steps so I can share a tutorial with you. So here we go!


 You need:
  • assorted fabric scraps
  • 10" x 10" (25 x 25cm) piece of cotton quilt batting (not polyester)
  • 10" x 10" (25 x 25cm) piece of Insul-bright*
  • 10" x 10" (25 x 25cm) backing fabric
  • single fold quilt binding  - approximately 35" (90cm)
*Insul-bright is available from large sewing and fabric stores or online and is usually kept in the same area as the quilt batting or interfacing. It is a heat resistant material made specifically for projects like pot holders, oven mitts or casserole carriers. If you don't have any or can't source it, I recommend using 3 layers of cotton quilt batting instead.


Once you have gathered all your materials, take your fabric scraps to make the patchwork panel for the front of the pot holder. You want it to be approximately 11" x 11" to allow for shrinkage when adding quilting, and also to allow for trimming.


I usually start to make my random patchwork panels with two small pieces, then I build the panel from there.


When creating a patchwork panel I press seams and trim after each addition.


When building your panel, add each new piece along a full edge of the main patchwork piece. You need to work with a whole edge at a time. You can see in the above picture that the new piece will be added along the entire top raw edge. Below, the next piece is added to the bottom raw edge.

There is a really good tutorial on making random patchwork blocks or panels in the book Sunday Morning Quilts which I have referred to often when doing these kinds of projects.


Other alternatives to a patchwork panel for this pot holder are - using quilt blocks, or just one piece of fabric that is 10" x 10". You could also do a more uniform patchwork panel, using only 2.5" squares.


 Once your panel is complete and you are sure that it is larger than 10" x 10", sandwich the layers together.


My quilt sandwich for this potholder is: patchwork panel, then cotton batting, then insul-bright, then backing fabric. Baste together with a couple of pins if desired.

Add some lines of quilting to secure the layers together. The layers of batting and insul-bright add quite a lot of bulk so simple lines work best. Once you are done, trim it down to 10" x 10", or so that all the layers meet evenly at each edge.

Next, round off your corners. This is optional but I prefer the rounded edge shape, and it allows the binding to go around continuously rather than having to mitre corners. I use a small plate and a marker to mark the rounded edges.


Then I trim the corners off with my rotary cutter.


Now you are ready for binding. I use single fold binding - these ones were left over from large quilting projects. Align the raw edges of the pot holder and the binding and pin it all the way around.


To finish the binding, carefully stitch the ends together and trim off any excess. You can see my binding seam in this picture.


Stitch your binding on using a 1/4" seam all the way around the raw edge. It might pinch in a few spots around the curves, so stitch slowly and smooth the binding as you go to avoid any pinches.


Trim the edges if you need to, then flip the binding over to the back. Stitch your binding on either by hand (my preferred method, I like the control I have when hand stitching binding) or with your machine.


And then you are finished! While I was at it, I also made another one using pink and blue scraps. I used a lot less quilting lines in this one.


I decided at the last minute to add a couple of loops so I could hang these in the cupboard. I added a small ribbon loop and secured it by stitching on the little apple button.You can also stitch a loop into the binding when sewing that on.


They are both a little bit wonky, so lucky I am not a perfectionist. I really like them both though,and I'm particularly smitten with that orange and aqua colour scheme. Talk about cooking in style!

If you make any I'd love to see them! Share them with me on Instagram, on my Facebook page or add them to my flickr group. I can't wait to see your fabric combinations!

If you need to scrap bust even more, I recommend you check out my scrappy fabric pouch tutorial too!


Friday, February 7, 2014

DIY Beaded Zipper Pull - Tutorial


When I made my most recent pouch for the Sweet Pouch Swap, I felt like it needed something a bit extra. A bit of bling perhaps? Several years ago I used to dabble in some jewellery making and I've kept all my supplies and tools, so I made a little beaded zipper pull. I was so happy with it - it added that little extra 'something' to the project and was really quick and easy to make. I've tinkered around and come up with this tutorial so you can make some too! 

Here is what you need:


All these are readily available in the beading / jewellery making section of your local craft store. There is also a huge range available online - Amazon has a huge range on their beading and jewellery supplies pages and you can also check out sites like Etsy and Craftumi.

1. Take a head pin and arrange your beads. Leave approximately 1cm (1/2") of wire at the top.


2. If necessary, use your wire cutting pliers to cut your head pin to size.


3. Use the round nose pliers to twist the top of the head pin into a loop. You may need to manipulate it a little bit to achieve the desired result.


5. Take a split ring and attach it to the loop at the top of the head pin.


6. Attach the beaded zipper pull to the zipper using the split ring.


All finished! Now make a bunch of them and make your zipper projects pretty!


If you make a beaded zipper pull using my tutorial, please share - I'd love to see it! Post it on my facebook page, tag me in your instagram pic or add it to my flickr group. To keep up to date with all my sewing projects and tutorials, make sure you sign up for my newsletter!

Related Posts Plugin for WordPress, Blogger...