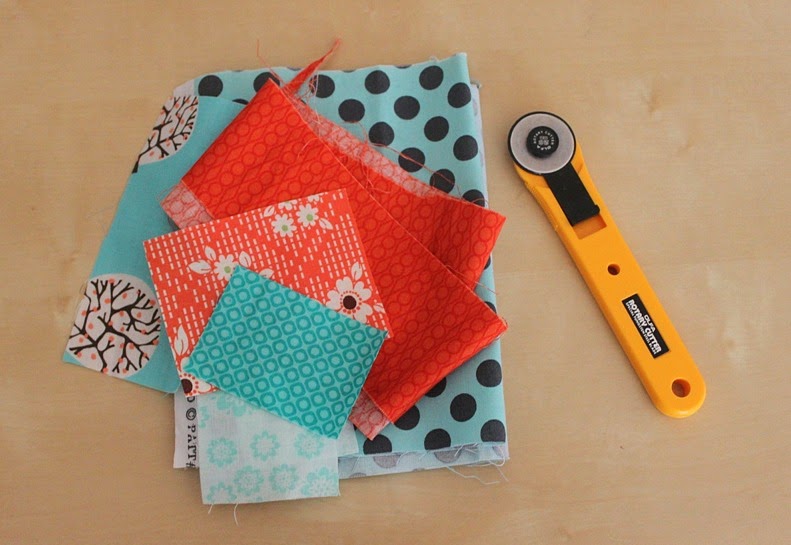
Some feedback I've been getting lately is that many people who read here are beginners or intermediate beginners. {Welcome! *waves hello*} Knowing that I've decided that every now and then I'll write a blog post based on simple skills that can really take your quilting and sewing projects to the next level.
Confession. When I first started sewing I had to google "what is fussy cutting" and I wish someone had written this blog post for me!
Showing posts with label fabric scraps. Show all posts
Sunday, February 15, 2015
Friday, December 19, 2014
Quilted Hexie Mug Rug
I joined the Festive Mug Rug Swap hosted by Gnome Angel last month and was inspired to try something different for this project. I love swaps for that reason - an excuse to make something and send some happy mail, and a chance to flex some creative muscle and try new techniques.
I love the aqua, red and white colour combination, and together with this tutorial from Modern Handcraft, I came up with this festive quilty good thing.
I have to confess that I was STOKED with the outcome. It's so pretty. The quilting is really striking and very easy to achieve by following the shape of the hexagons.
I love the aqua, red and white colour combination, and together with this tutorial from Modern Handcraft, I came up with this festive quilty good thing.
I have to confess that I was STOKED with the outcome. It's so pretty. The quilting is really striking and very easy to achieve by following the shape of the hexagons.
Monday, June 23, 2014
Pink & Aqua Quilt in Progress
Some friends of ours have just welcomed a beautiful baby girl, but I started working on this for her before I even knew she would be a girl. They chose not to find out the gender of their baby until she arrived but I took a gamble because I could just feel in my heart that a baby girl was on the way!
The couple who welcomed their sweet new daughter are not particularly cutesy people so I avoided any traditional baby prints and used a lot of blenders - polka dots, stripes and ditsy prints. Pink, aqua and grey is a lovely palette for a new baby girl and is not too overwhelming on the pink.
Friday, April 25, 2014
Scrappy Pot Holders - Tutorial
Have you got lots of scrap fabric lying around? Me too. And lately my oven mitts seem to have disappeared. Although I vaguely recollect one of the girls walking around the house with them on her feet pretending to be a duck, so maybe I need to take a closer look in the dress ups box?
Oh well - after making these pot holders for my Nan for Christmas, I decided to make up a couple more for myself, and take photos of all my steps so I can share a tutorial with you. So here we go!
You need:
- assorted fabric scraps
- 10" x 10" (25 x 25cm) piece of cotton quilt batting (not polyester)
- 10" x 10" (25 x 25cm) piece of Insul-bright*
- 10" x 10" (25 x 25cm) backing fabric
- single fold quilt binding - approximately 35" (90cm)
Once you have gathered all your materials, take your fabric scraps to make the patchwork panel for the front of the pot holder. You want it to be approximately 11" x 11" to allow for shrinkage when adding quilting, and also to allow for trimming.
I usually start to make my random patchwork panels with two small pieces, then I build the panel from there.
When creating a patchwork panel I press seams and trim after each addition.
When building your panel, add each new piece along a full edge of the main patchwork piece. You need to work with a whole edge at a time. You can see in the above picture that the new piece will be added along the entire top raw edge. Below, the next piece is added to the bottom raw edge.
There is a really good tutorial on making random patchwork blocks or panels in the book Sunday Morning Quilts which I have referred to often when doing these kinds of projects.
Other alternatives to a patchwork panel for this pot holder are - using quilt blocks, or just one piece of fabric that is 10" x 10". You could also do a more uniform patchwork panel, using only 2.5" squares.
Once your panel is complete and you are sure that it is larger than 10" x 10", sandwich the layers together.
My quilt sandwich for this potholder is: patchwork panel, then cotton batting, then insul-bright, then backing fabric. Baste together with a couple of pins if desired.
Add some lines of quilting to secure the layers together. The layers of batting and insul-bright add quite a lot of bulk so simple lines work best. Once you are done, trim it down to 10" x 10", or so that all the layers meet evenly at each edge.
Next, round off your corners. This is optional but I prefer the rounded edge shape, and it allows the binding to go around continuously rather than having to mitre corners. I use a small plate and a marker to mark the rounded edges.
Then I trim the corners off with my rotary cutter.
Now you are ready for binding. I use single fold binding - these ones were left over from large quilting projects. Align the raw edges of the pot holder and the binding and pin it all the way around.
To finish the binding, carefully stitch the ends together and trim off any excess. You can see my binding seam in this picture.
Stitch your binding on using a 1/4" seam all the way around the raw edge. It might pinch in a few spots around the curves, so stitch slowly and smooth the binding as you go to avoid any pinches.
Trim the edges if you need to, then flip the binding over to the back. Stitch your binding on either by hand (my preferred method, I like the control I have when hand stitching binding) or with your machine.
And then you are finished! While I was at it, I also made another one using pink and blue scraps. I used a lot less quilting lines in this one.
I decided at the last minute to add a couple of loops so I could hang these in the cupboard. I added a small ribbon loop and secured it by stitching on the little apple button.You can also stitch a loop into the binding when sewing that on.
They are both a little bit wonky, so lucky I am not a perfectionist. I really like them both though,and I'm particularly smitten with that orange and aqua colour scheme. Talk about cooking in style!
If you make any I'd love to see them! Share them with me on Instagram, on my Facebook page or add them to my flickr group. I can't wait to see your fabric combinations!
If you need to scrap bust even more, I recommend you check out my scrappy fabric pouch tutorial too!
Wednesday, November 6, 2013
Selvedge Zip Pouch
For our holiday I decided that I didn't want to take my wallet, but I needed something to carry cash, as well as our passports and plane tickets when travelling. I finally pulled out my selvedges that I've been saving for ages, and made a selvedge pouch. I've made a couple of these before, but not for a long time and I've given them as gifts, so I'm thrilled to finally have one of my own!
I love making these, because it's like a trip down memory lane. A reminder of favourite fabrics that I used a long time ago, and have since run out of. It's also a nice reminder of old projects. When I am cutting fabric, I always trim my selvedges off retaining about an inch of the fabric. That way you can see a strip of it and it adds colour to these types of projects.
To make one of these pouches, I cut two pieces of cotton batting to the size I want my panels. Then I line up my selvedges and arrange them the way I want them. Starting from the bottom right hand corner I stitch each selvedge on top of the last onto the batting panel. Because their edges are sealed, you don't have to worry about the selvedges fraying. Once they are all stitched on, I trim up the panel and it's ready to be sewn up as a pouch.
I lined this pouch with a really bright yellow Heather Bailey print. It's so bright, it's almost neon and it makes me smile every time I look at it! I used a couple of scraps for my zip ends and I made them longer than usual which has given the zip ends a really neat finish.
I will definitely be making something else with my selvedges soon, I really enjoyed putting them together for this project. Maybe I should make something on a bigger scale? But what? Or maybe I'll save them for the next Sweet Pouch Swap? (which Alyce and I have decided to do in the early in new year - stay tuned!)
I love making these, because it's like a trip down memory lane. A reminder of favourite fabrics that I used a long time ago, and have since run out of. It's also a nice reminder of old projects. When I am cutting fabric, I always trim my selvedges off retaining about an inch of the fabric. That way you can see a strip of it and it adds colour to these types of projects.
To make one of these pouches, I cut two pieces of cotton batting to the size I want my panels. Then I line up my selvedges and arrange them the way I want them. Starting from the bottom right hand corner I stitch each selvedge on top of the last onto the batting panel. Because their edges are sealed, you don't have to worry about the selvedges fraying. Once they are all stitched on, I trim up the panel and it's ready to be sewn up as a pouch.
I lined this pouch with a really bright yellow Heather Bailey print. It's so bright, it's almost neon and it makes me smile every time I look at it! I used a couple of scraps for my zip ends and I made them longer than usual which has given the zip ends a really neat finish.
I will definitely be making something else with my selvedges soon, I really enjoyed putting them together for this project. Maybe I should make something on a bigger scale? But what? Or maybe I'll save them for the next Sweet Pouch Swap? (which Alyce and I have decided to do in the early in new year - stay tuned!)
Monday, October 14, 2013
Hexies are Sexy
In a couple of weeks we will be going away on holiday. Hurrah! Super exciting, but my mind has already switched into vacation mode. I'm loathe to start any big projects, I'm not even thinking about Christmas (only 71 days away - whatever.) I just want quick projects that I can complete in an hour or two.
My scrap basket is out of control at the moment. I struggle to throw fabric scraps away so I've been trying really hard to bust the ever growing pile and make use of what I have. I've been seeing hexagon projects around and I decided on a whim the other night that making hexis would be preferable to watching my husband's choice of Die Hard 4. Each hexi is quick to make, it's very calming to sit and stitch in front of the TV, and there is a real sense of achievement once your little hexi collection grows!
I'd never made any before so I just printed off this page of paper templates and I watched a couple of You Tube videos to get me started.
There will be no hexi quilt - that's just crazy talk. Imagine how many you would need!? Especially since these little babies are only 1" hexies. I plan to use these just as pretty embellishments on small projects. You can see that I've already stitched a few together (the love birds) and I will applique them to a denim pouch that I have cut out and ready to sew. I plan to use it to carry my money while I'm away.
They suit small ditsy prints and fussy cuts, so it's fun picking through the scraps to find fabrics that will work as a small unit. I don't have a lot of small prints, they are definitely something I need to add to my stash, as I find I tend to be drawn to larger prints.
These little hexagons are quite addictive! Do you make them? What type of projects have you used them for?
Tuesday, September 10, 2013
Quilt As You Go Pot Holders
My Nan doesn't have any pot holders or oven mitts to use when she is cooking, she usually just uses dish towels. So I decided to make her some as a gift!
I've been making an effort to use my scraps lately, so this was a perfect opportunity to raid the scrap bin again. I pulled out pieces at random - there is no planned colour scheme or fabric choices here, it was just whatever I grabbed!
These were pretty quick and easy to make. The main thing you need is Insulbrite, which is a heat resistant inner layer that you use a bit like batting or interfacing. I purchased mine at my local fabric chain store, it was stocked in amongst the batting, it was sold from a large roll.
To do the quilting I had a layer of insulbrite, a layer of cotton batting on top, then I used the quilt-as-you-go method to stitch the fabric on. I started with my middle piece and worked my way around in a log cabin style.
Once I had all my pieces stitched on, I trimmed it up and used the rim of a coffee mug to round off the corners. Then I cut a piece of quilting cotton to back it with, and stitched in the ditch around the log cabin to quilt the layers together.
Finally I used some bias binding I had on hand to finish them off, and some small pieces of ribbon to create loops for hanging.
So that's it! I'm trying to make a real effort at the moment to use what I have. My stash has really grown over the past year and I need to use all up it rather than buy more... let's see if I can stick to that plan.
Hope my Nan likes them! I'm feeling confident - she has form for being very complimentary about all my creative endevours over the past 33 years. Grandparents are the best.
I've been making an effort to use my scraps lately, so this was a perfect opportunity to raid the scrap bin again. I pulled out pieces at random - there is no planned colour scheme or fabric choices here, it was just whatever I grabbed!
These were pretty quick and easy to make. The main thing you need is Insulbrite, which is a heat resistant inner layer that you use a bit like batting or interfacing. I purchased mine at my local fabric chain store, it was stocked in amongst the batting, it was sold from a large roll.
To do the quilting I had a layer of insulbrite, a layer of cotton batting on top, then I used the quilt-as-you-go method to stitch the fabric on. I started with my middle piece and worked my way around in a log cabin style.
Once I had all my pieces stitched on, I trimmed it up and used the rim of a coffee mug to round off the corners. Then I cut a piece of quilting cotton to back it with, and stitched in the ditch around the log cabin to quilt the layers together.
Finally I used some bias binding I had on hand to finish them off, and some small pieces of ribbon to create loops for hanging.
So that's it! I'm trying to make a real effort at the moment to use what I have. My stash has really grown over the past year and I need to use all up it rather than buy more... let's see if I can stick to that plan.
Hope my Nan likes them! I'm feeling confident - she has form for being very complimentary about all my creative endevours over the past 33 years. Grandparents are the best.
Tuesday, September 3, 2013
Scrappy Fabric Strip Zipper Pouch - Tutorial
Spring is here in Melbourne and to celebrate I like to go through and give things a good clean out and declutter. The stash is not immune from this - it's a fabric jungle in there. First thing to tackle: the scrap bin. Does yours overflow like mine? Excellent - let's make a bunch of these and have them up our sleeves for teacher gifts and those odd times you need a quick present and you don't have time to make one!
This spring project is part of the Spring Has Sprung blog tour hosted by Jane from Lil Pip Designs and Cass from Cass Can Sew.
This zip pouch is made with scraps sewn together to form panels, then some quilting lines are added to create a nice sturdy pouch. This pouch measures 10.5" long and 7" tall when finished. You can make different sizes, just cut your strips a bit shorter and don't add as many to the panel.
It's very quick and easy - here's how you do it.
Materials:
- fabric scraps - 14 strips cut 2" wide and 9" long.
- some quilt batting scraps
- fabric for lining (no more that a fat quarter)
- a 12" zipper
- rotary cutter and mat
1. Cut and press your fabric strips. Line them up next to each other and choose which ones you want to sew together for each panel. There is 7 strips per panel.
2. Sew the strips together along the long edges using a 1/4" seam allowance. Press seams open.
3. Use your panels as a guide and cut two pieces of batting and two pieces of lining to the same size.
4. Place your panel on top of a piece of batting and stitch either side of the seams in the panel. I used the width of my presser foot as my guide. Start from the middle seams and work your way out.
5. Trim up your panels. Trim lining pieces if required so that the panels and lining are the same size. Your quilted panels will look like this:
6. Time to sew in the zip. Attach a zipper foot to your sewing machine.
7. Place a quilted panel right side up, then place the zip face down on top of it.
8. Place the lining right sides down over the top. Stitch along the top edge to secure the panel, zip and lining together.
9. Repeat for second panel and lining. Open out and lightly press.
11. Stitch down each side of the zipper (as indicated by the dotted lines in the picture below). This secures the panel and lining pieces together and ensures the lining doesn't poke out and get caught in the zipper teeth.
12. Open the zipper halfway. This is essential - don't forget this part! Otherwise you won't be able to turn your zip pouch out once you've stitched the sides.
13. Place the panels right sides together and the lining right sides together. Pin and stitch all the way around (as shown by the dotted lines in the picture below), leaving a gap in the lining for turning. Make sure the zipper is folded so the teeth face into the lining. If you are not sure what I mean, give this post a quick read.
15. Box the corners. If you want your pouch to have a flat bottom and stand up like the one in the picture, you will need to box the corners. If you are happy to have a flat pouch that you can slip into your handbag, you can skip this step.
Fold corners to form a triangle so that seams are aligned down the centre of the triangle. Measure 1.5" or 4 cm in from the point of the triangle. Mark with a fabric pen. Stitch across the triangle. Cut off corner.
16. Repeat for remaining 3 corners.
17. Turn your pouch through the gap in the lining. Stitch lining gap closed. Give your pouch a very gentle press if it's a bit wrinkly.
That's it - you are finished! Add a scrap of ribbon as a zip pull if you like.
If you make a pouch using this tutorial I'd love to see it! Share them in my flickr group or post them on my facebook page - it really makes my day!
For more tutorials and everything about sewing, make sure you sign up for my newsletter!
If you make a pouch using this tutorial I'd love you to share! Tweet me, post a picture to my facebook timeline, send me the link to your blog or upload a picture to my Flickr pool! I love seeing what people make from my tutorials, it makes my day!
- See more at: http://www.sewdelicious.com.au/2012/09/simple-zip-pouch-tutorial-for-beginners.html#sthash.2mHxUQZb.dpuf
If you make a pouch using this tutorial I'd love you to share! Tweet me, post a picture to my facebook timeline, send me the link to your blog or upload a picture to my Flickr pool! I love seeing what people make from my tutorials, it makes my day!
- See more at: http://www.sewdelicious.com.au/2012/09/simple-zip-pouch-tutorial-for-beginners.html#sthash.2mHxUQZb.dpuf
If you make a pouch using this tutorial I'd love you to share! Tweet me, post a picture to my facebook timeline, send me the link to your blog or upload a picture to my Flickr pool! I love seeing what people make from my tutorials, it makes my day!
- See more at: http://www.sewdelicious.com.au/2012/09/simple-zip-pouch-tutorial-for-beginners.html#sthash.2mHxUQZb.dpuf
If you make a pouch using this tutorial I'd love you to share! Tweet me, post a picture to my facebook timeline, send me the link to your blog or upload a picture to my Flickr pool! I love seeing what people make from my tutorials, it makes my day!
- See more at: http://www.sewdelicious.com.au/2012/09/simple-zip-pouch-tutorial-for-beginners.html#sthash.2mHxUQZb.dpuf
Tuesday, November 6, 2012
How to Make a Fabric Button Brooch - Tutorial
Here is an easy project for you and you can make these brooches to go with any outfit, to pin to your tote bag or to give as a cute gift!
I used Kokka Trefle Folklore Owls fabric for my brooch, but you can use anything! The possibilities are endless and these brooches are a great way to use up fabric scraps.
You need:
- scrap of fabric
- a self covering flat back button (I used size 45)*
- self covering fabric button tool (clear is best)*
- small brooch pin*
- hot glue gun or E6000 glue*
* All these items can be purchased at a craft store, or more easily online using craft supplies sites such as Etsy & Craftumi.
Take your fabric and button front piece, and place fabric over the button. Push into the large piece of the button making tool.
I recommend getting a clear tool if you can, so you can check the positioning of your fabric once your button has been pushed in.
Once you are happy with the position of your fabric, go ahead and use the tool to complete making the button. If you haven't made a fabric covered button before, here is a great tutorial by Cass Can Sew.
Turn the button over and carefully place a small amount of glue on the back of the button.
Press the brooch pin into the glue firmly. Be fast if you are working with a hot glue gun as the glue will dry very quickly.
Allow the glue to dry and you are finished!
Now go and make a whole bunch more with your scraps!
If you make some brooches using this tutorial I'd love you to share! Tweet me, post a picture to my facebook timeline, send me the link to your blog or upload a picture to my Flickr pool! I love seeing what people make from my tutorials, it makes my day!
I used Kokka Trefle Folklore Owls fabric for my brooch, but you can use anything! The possibilities are endless and these brooches are a great way to use up fabric scraps.
You need:
- scrap of fabric
- a self covering flat back button (I used size 45)*
- self covering fabric button tool (clear is best)*
- small brooch pin*
- hot glue gun or E6000 glue*
* All these items can be purchased at a craft store, or more easily online using craft supplies sites such as Etsy & Craftumi.
Take your fabric and button front piece, and place fabric over the button. Push into the large piece of the button making tool.
I recommend getting a clear tool if you can, so you can check the positioning of your fabric once your button has been pushed in.
Once you are happy with the position of your fabric, go ahead and use the tool to complete making the button. If you haven't made a fabric covered button before, here is a great tutorial by Cass Can Sew.
Turn the button over and carefully place a small amount of glue on the back of the button.
Press the brooch pin into the glue firmly. Be fast if you are working with a hot glue gun as the glue will dry very quickly.
Allow the glue to dry and you are finished!
Now go and make a whole bunch more with your scraps!
If you make some brooches using this tutorial I'd love you to share! Tweet me, post a picture to my facebook timeline, send me the link to your blog or upload a picture to my Flickr pool! I love seeing what people make from my tutorials, it makes my day!
Subscribe to:
Posts (Atom)