
Given the frequency that I visit, I decided I needed a new library bag. I wanted my library bag to be fun, but grown up. Inspired by a slogan I've seen on Pinterest and other places on the web, here is my finished product!
Pin It

I did a google search to see if this slogan came from anywhere in particular, but obviously I am a bit late in noticing it because it seems to be everywhere, so I will credit Sir Mix-a-lot. (yes, you know the song!)
Would you like to make one too? Here is the tute. Be warned - it is a LONG tutorial because it covers designing your slogan/image on the computer, then the sewing of the bag.
You need:
- 1/2 metre/yard of calico or other solid fabric
- 1/2 m/y of fabric for lining
- 1 metre of cotton ribbon, other ribbon or calico strips for shoulder straps
- machine, thread, cutting tools etc
- T-shirt transfer paper. Mine was about $20 a pack at my local craft store
- iron and ironing board
- computer and printer

First you need to create the image or slogan you want on your bag. I did this using two different techniques - using Picnik (update - I know use Picmonkey as piknic no longer exists. It is almost exactly the same site!) to create an image then using Microsoft Word to resize the image and print, or just simply using Microsoft Word.
If you are not sure about designing your own slogan, use mine! Get the Big Books Printable here.
First, Picmonkey - unfortunately there is not an option to start with a blank image, so I just upload any picture. Have a look along the tabs above your image and choose 'stickers'. Down the stickers list you will see 'Geometric'. Choose a rectangle and resize it to cover your existing image.

Once you have done that, create your image or slogan. I used the 'text' tab and played around with different fonts and layouts until I was happy with my image.

Once you are happy with your image, go to the main tabs above and click 'save and share'.
Open Microsoft Word or other word processing program, and open a new page. Choose to insert a picture and open your recently created Picmonkey image. Resize it on the page to how big you require it to be and double check it using Print Preview.
This part depends on your printer. Go to Print and choose Properties. In the Media Type box, scroll down and find the T-Shirt transfer paper option. Select it.

Using this option, my computer automatically flips the image. If you have text in your image it must be flipped, so when you iron it on to your fabric it will come out the right way.
**Important: Do a test print using plain paper. If it reverses your image, you are ready to print onto your t-shirt transfer paper. Just double check your settings in properties again before you hit the print button.
If your computer does not automatically flip your image, you can do it yourself. Click on your image, and in the above tabs choose Picture Tools. Choose Rotate, then choose Flip Horizontal. (you can see the picture tools in the screen grab below.)

When you print this, in Properties just choose the highest quality printing option you can. Again, do a test run with plain paper - you don't want to waste that expensive transfer paper!
If you are choosing to just create a page in your word processor to print, you will have to make sure your printer had the t-shirt transfer option available, because you cannot flip your basic text in the same way as an image.
Once printed you should end up with this:
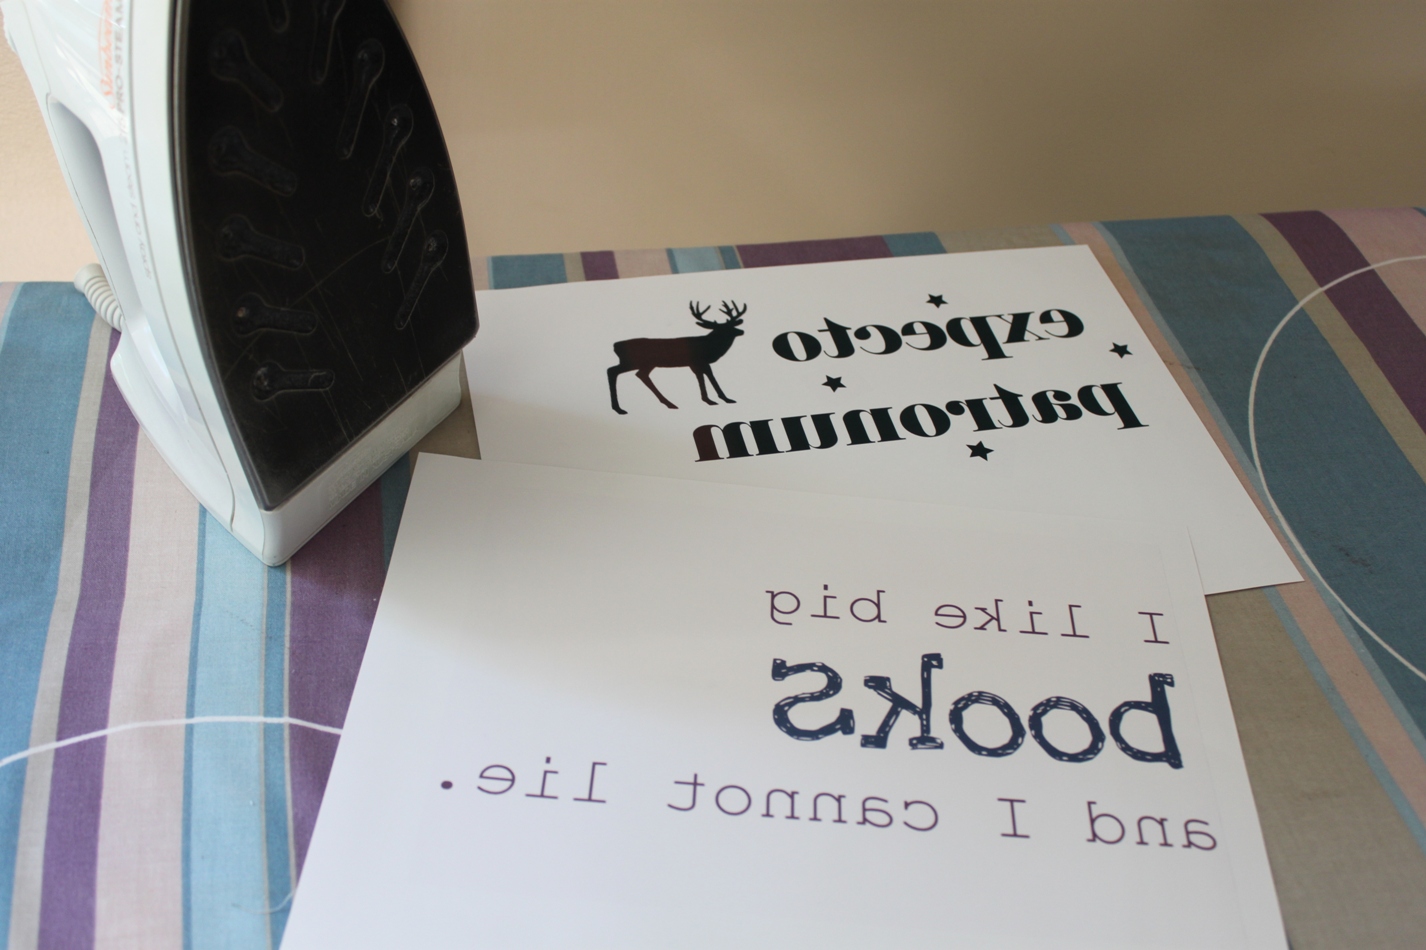
As you can see I was in the process of making two bags - one for me and one for my sister who is a big Harry Potter fan!
Now onto the sewing - cut two pieces of outer fabric (I used a simple calico) to 35 cm wide(14") x 42cm long (16"). Do the same with your lining pieces.

Trim your transfer to make it easier to iron on.

Iron your fabrics. Following the instructions on the packet, position and iron your transfer onto your outer fabric.

When you have finished ironing it, give it another quick iron, just to be sure. Once it has cooled down, peel the backing paper off your transfer and you should have your slogan or image nicely adhered to your fabric.
Place both fabrics right sides together.

Sew your exterior fabric around three sides with a 1cm seam allowance. Clip corners and trim seams. (Oh look at my poor cutting mat! It has seen lots of projects!)

With the lining pieces, sew down the sides, but along the bottom leave a 10cm (4") gap along the bottom. (The floral print makes my pins hard to see, but if you look closely you can see the pins marking the gap)

Place the exterior bag inside the lining so that the right sides are together.

Now we can add some shoulder straps. I used some cotton ribbon that I ripped off a paper bag from a fancy clothing store because I am
Pin your straps inside like this:


Sew the whole way around the top of your bag. Reverse over your straps for extra strength.
Use the gap in the lining to pull your bag through to the right way out.

With the gap in the lining, pinch the raw edges under to line up with the existing seam.

Sew the gap shut, stitching close to the edge.

Push your lining into your bag. Almost finished... Use your iron to press around the top of your bag.

You are finished!!

Now you can go to the library and feel smug when people say 'Love your bag, where did you get it?'
If you make one, I'd love to see it - make sure you share it in my flickr pool!
too funny! I love it!
ReplyDeleteYou should join me in "Handmade 52" this year!
http://raisingoranges.blogspot.com/2012/01/handmade-52.html
A fabulous bag, Ros!!! Quite some time ago, my husband fused transfer paper to the drum of our laser printer, requiring us to purchase an expensive new drum for the printer. According to Google, they now make t-shirt transfer paper for laser printers. Thanks for sharing a very comprehensive tutorial.
ReplyDeleteRos, back in the day I used to work at your local library so I can vouch for its awesome-ness. And this bag is a whole lot of awesome! I covet it.
ReplyDeleteI am so making this for my daughter before she goes off to uni
ReplyDeleteAwesome tutorial! You did a get job.
ReplyDelete~Mrs. Delightful
ourdelightfulhome.blogspot.com
I made one like that for a friend for Christmas. I love that quote and your tutorial is great.
ReplyDeleteYou can check out mine here:
http://bilingual-crafting-sewing.blogspot.com/2011/12/christmas-gifts-weihnachtsgeschenke.html
Greetings from Germany
Catrin
Love it!
ReplyDeleteTotally made me smile. Love it! Thanks for sharing!
ReplyDeleteThank you for the gigglefest you gave my daughter and me this morning! I just love your bag!
ReplyDeleteI love this. Too cute! I LOVED that song way back when. Still do. ;-)
ReplyDeleteI love this!!!!! x
ReplyDeleteI love this!! It's funny and cute!!
ReplyDeleteMarvellous, I'm definitely doing this
ReplyDeleteThis is awesome! I have to try it!!!
ReplyDeleteP.S. I'm your newest follower!
ReplyDeleteGreat project, cute caption, well written instructions. Good job!
ReplyDeleteomg! I love this! I have a 9 yo (girl, even!) who loves books and that song!
ReplyDeleteI'd love to know more about your library's rhyming sessions...sounds fun.
Thanks for linking to Take-A-Look Tuesday - you were featured today!
ReplyDelete- Mandy, www.SugarBeeCrafts.com
Love it and FYI I had never heard that saying til I read your post! I must live a very sheltered life :)
ReplyDeleteLove this Tutorial! I'll have to make one of these bags for my mom with the kids pictures and cute sayings on it!
ReplyDeleteTorri
Oh my dear, I am cracking up!! Awesome bag! Thanks for stopping by my blog earlier. Btw, new follower :)
ReplyDeleteLOVE IT!!!! You should seriously consider making extras and selling them on Etsy, for those of us craftily challenged. I know I would buy one!
ReplyDeletethe song goes i love big butts and i can not lie
ReplyDeleteLove the bag and the saying! It's a play off the actual song, so it's not the actual lyrics.
ReplyDeleteThis is awesome but I can't sew... I was going to send to my husband to buy for me but clearly that's not possible! Any way I can pay you to make & ship it to me?! :-D
ReplyDeleteHi Saira,
DeleteI actually have plans for an etsy shop and I plan to open it in a couple of weeks! So yes, I can make one for you! Perhaps you can shoot me an email so we can organise the details, I wasn't planning to sell these in my shop but I will do a custom listing for you :) roslynruss(at)gmail(dot)com.
Brilliant, thanks for sharing
ReplyDeleteCan't wait to make and sent my sister her new book bag, thanks so much!!
ReplyDeleteI laughed SO hard when I saw this. Definitely will have to make one. Sometime. But definitely. *grin*
ReplyDeleteI LOVE this! I found it awhile back and laughed! My best friend and I *used* to sing that song all the time...I am putting this on my to do list so I can make one for her since she really is a huge fan of books and loves to read!
ReplyDeleteHelen
Blue Eyed Beauty Blog
I need to make a library bag for the little girl I nanny. We go to the library once a week (usually on Thursdays because they have an awesome story time then) and I'm always struggling to carry out all the books we get. I don't know why it never occurred to me to bring a bag before... hmm...
ReplyDeleteJust made one of these, but instead of ironing on the words, I stitched them (backstich for all the words except 'BOOKS', which I cut out of fabric and blanket-stitched on) and it looks AMAZING! Thanks so much for the inspiration!
ReplyDeleteThat sounds awesome!! I've been loving embroidery lately, I might have to give it a go :)
DeleteI would love to see photos, Crafty Cat.
Delete