
That happened to me with this quilt. It's the first quilt I have made for myself and it's been lovely this winter to snuggle into it while I watch TV or read in the evenings.

This is a lap quilt made with large half square triangles. The final size is a 56 inch (142cm) square.
To make it, you need:
Fabric A (grey): 13 x 10" squares
Fabric B (aqua): 13 x 10" squares
Diamond (red) : 10 x 10" squares
60" x 60" fabric for backing (I used an extra wide sheeting fabric or you can piece together)
1/2 yard fabric for binding
1. Pair your fabric squares together to make your half square triangles (HSTs).
You need to pair: 5 diamond colour with 5 Fabric A.
5 diamond colour with 5 Fabric B.
Pair the remainder of A with B squares.
Tip: make sure you pair any directional prints with non-directional fabrics. That way they can be easily orientated on the quilt without any prints being accidentally upside down.
2. Sew up your HSTs.
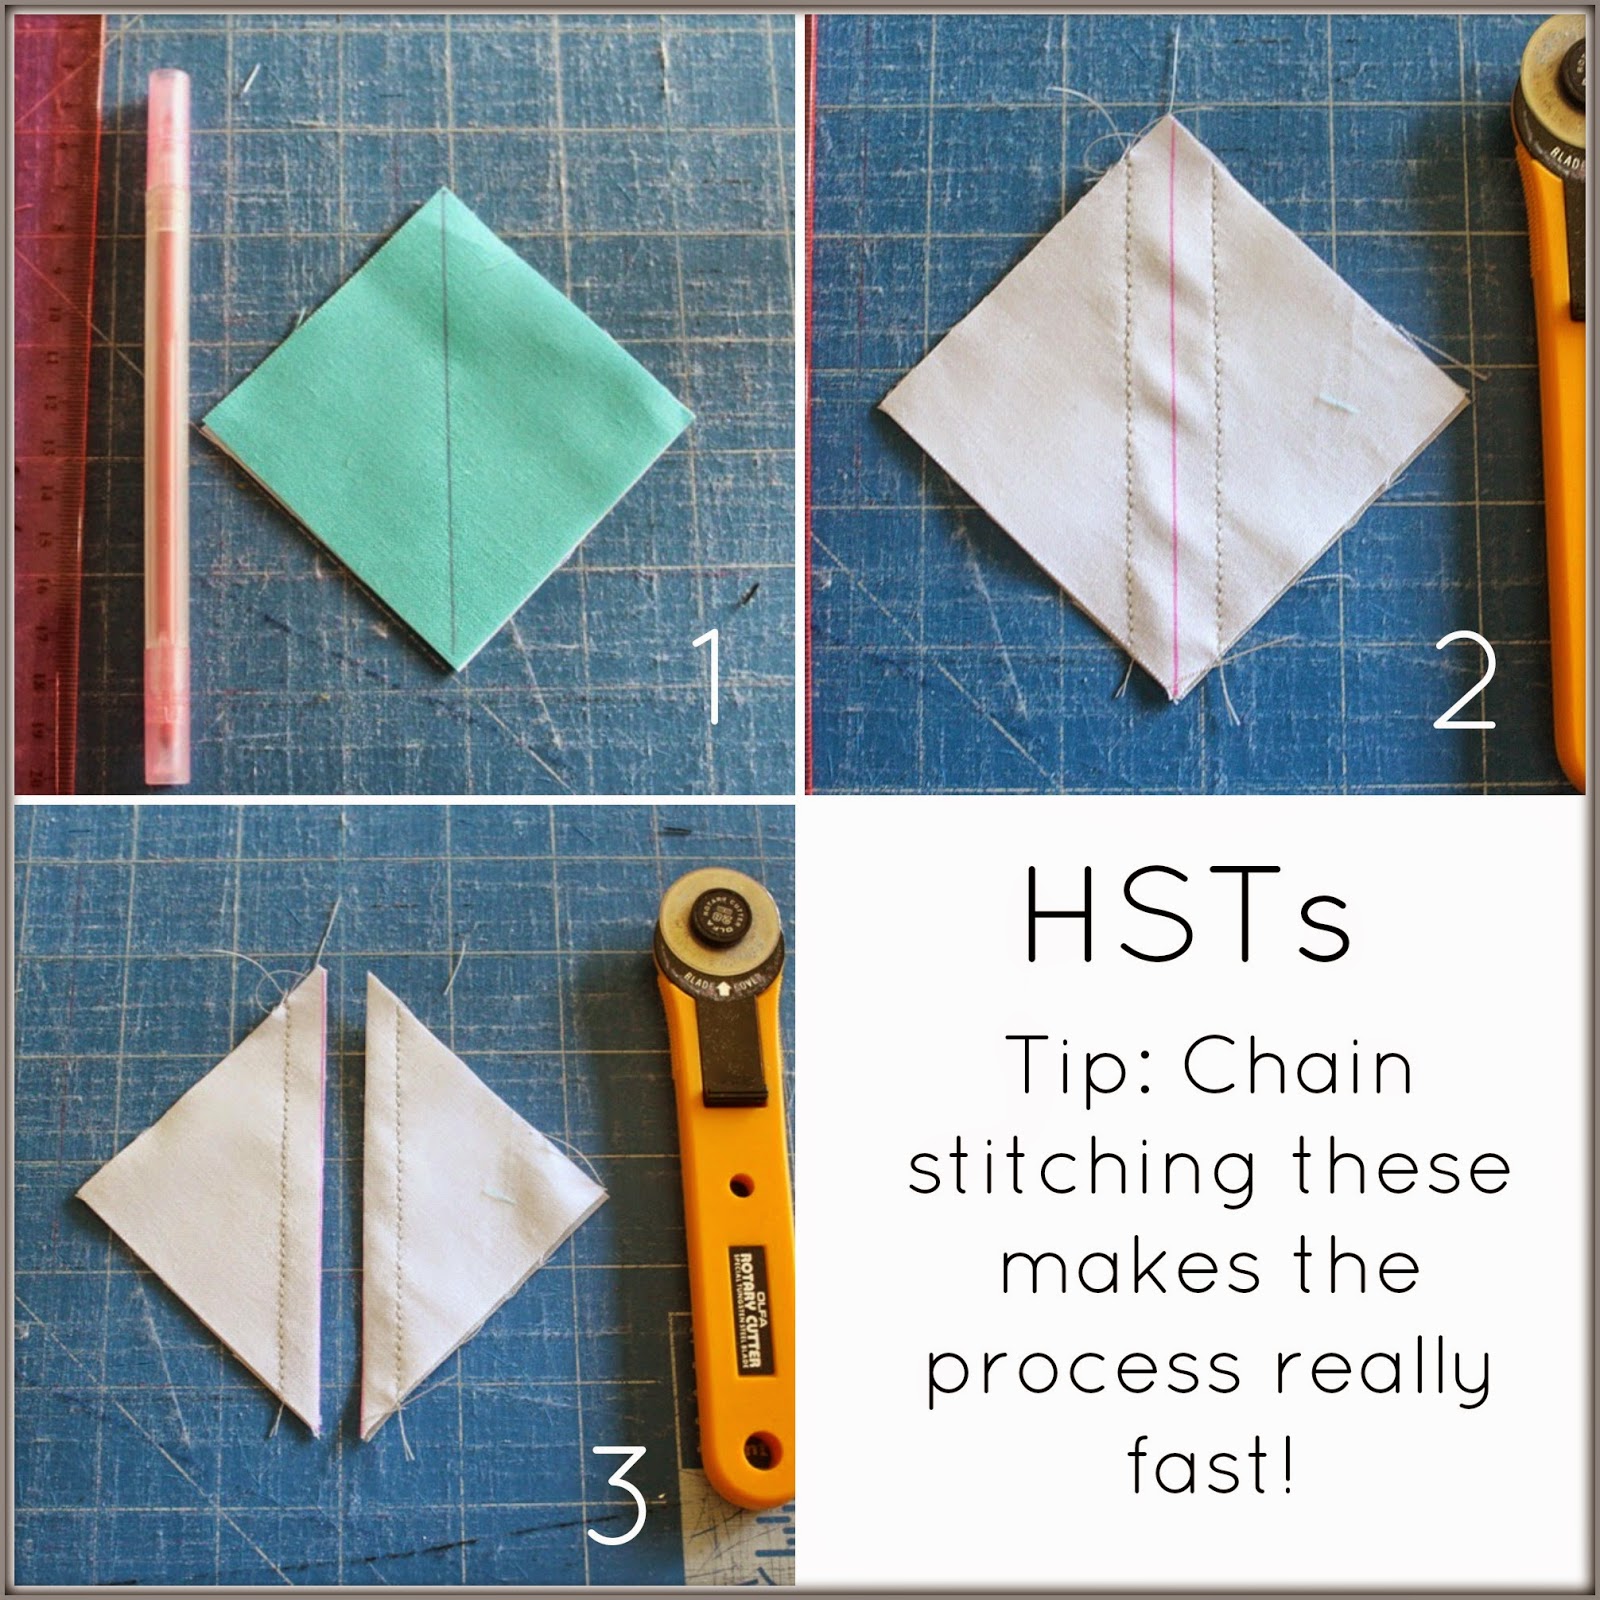
To make your HSTs -
1. Lay your two squares right sides together. Use a washable marker and draw a line from corner to opposite corner.
2. Stitch 1/4" either side of your marked line.
3. Cut down your marked line. Open out and press.
3. Lay out your quilt.
To get that diamond effect through the whole quilt, the seams of your HSTs must be arranged in a particular way. This diagram shows you how to lay out your quilt and position each HST.

4. Once your quilt is laid out and you have finalised your HST placement, sew together each row with a 1/4" seam.
5. Sew together the rows to complete your quilt top.
6. Baste your quilt.
7. Quilt as desired. I have quilted this very simply and stitched 1cm each side of the red diamond and of all the seams that echo around that diamond shape.

You are done!
This is a really quick quilt to put together and is perfect for beginners who are keen to experiment with something more interesting than square patchwork. The large HSTs means that there is not too much cutting and stitching to put the quilt top together.
Using this diamond style, you can be really creative with your fabric choices and give the design your own unique look.
You can also size it up or down by changing the size of your squares. For a smaller quilt, use 8" squares rather than 10".

If you make one I'd love to see it. Share it via my Facebook page, tag me on instagram or add it to my flickr group! Can't wait to see what colour combinations you use!

Love the diamond effect, Ros!!! A beautiful quilt and great that you've made it for yourself. Enjoy!!!
ReplyDeleteThis is absolutely gorgeous Ros! I always love your colour combinations :) One for the "to-do" list - as if it wasn't long enough - haha!
ReplyDeleteGorgeous Ros, I love the colours and the simplicity. It's certainly been lap quilt weather I'm sure you will get plenty of use from it
ReplyDeleteIt looks great
ReplyDeleteLove this one, Ros! I love how half square triangles seem to look great no matter how they are arranged
ReplyDeleteLovely - the diamond effect is fun too :)
ReplyDeleteThis is really cute! My grandson and his fiance are expecting a baby in Aug and this would be perfect. Her middle name is Diamond!!!
ReplyDelete